ADDING A NEW STUDENT
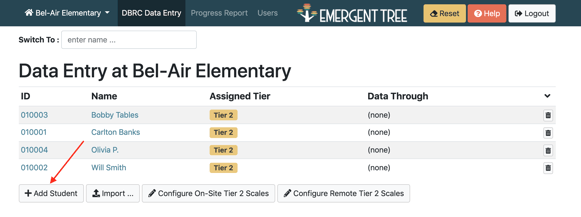
1. Select the DBRC Data Entry tab. Select “+Add Student”
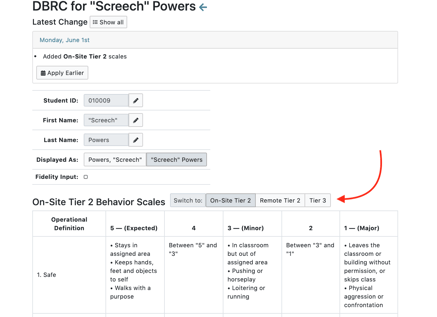
2. Enter student information including Student ID, First Name, Last Name.
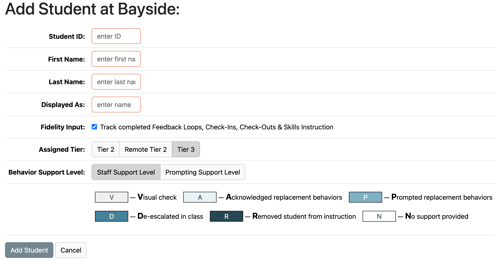
3. If selected, fidelity monitoring features will be activated. See section on Fidelity Input for more information.
4. Select tier for monitoring: On-site Tier 2 (Standardized), Remote Tier 2, Tier 3.
5. Select Support Levels: Staff Support Levels or Prompting Support Level. See section on Behavior Support Levels for more information.
6. Select “Add Student”
BUILDING DBRC (Tier 2)
Tier 2 DBRC Behavior Scale is a standardized scale based on Safe, Respectful, Responsible behaviors.
Behavior Scale
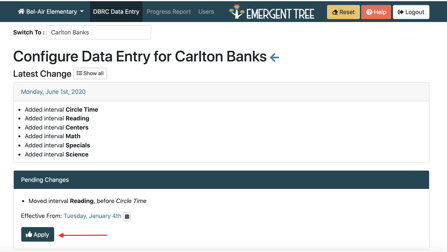
1. Select “Effective Date” to determine first date of data collection.
2. For Tier 2, the student Behavior Scales are autogenerated. Proceed to Reporting Schedule.
3. Enter number of reporting intervals (periods to rate behaviors). Select “Generate.”
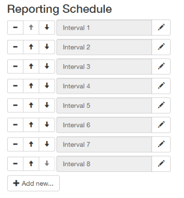
4. Name of intervals (“Math,” “English,” etc.). Remove or add intervals as needed. Edit intervals by selecting edit icon ( ![]() ) .
) .
5. Adjust order as needed. Select “Apply” when complete.

BUILDING DBRC (Tier 3)
Tier 3 DBRC Behavior Scale will now populate with a generic scale that can be changed. This allows users who have not yet completed a competing behavior pathway to begin taking data. This scale can be individualized for each student based on the Competing Behavior Pathway.
Behavior Scale
1. Select “Effective Date” to determine first date of data collection.
2. Enter scale name (i.e. using coping skills).
3. Enter scaled behaviors (5- 1).
4. Add a second Behavior Scale only if applicable to the student.
5. Continue to Reporting Schedule.
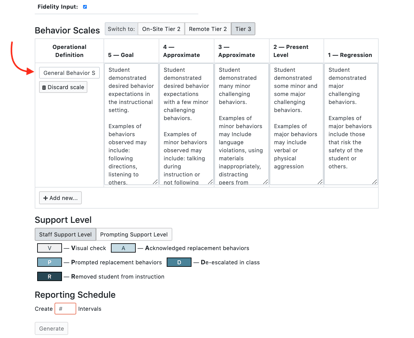
6. Enter number of reporting intervals (periods to rate behaviors). Select “Generate.”
7. Name of intervals (“Math,” “English,” etc.). Remove or add intervals as needed. Edit intervals by selecting edit icon ( ) .
8. Adjust order as needed. Select “Apply” when complete.
CHANGING A STUDENT'S TIER STATUS
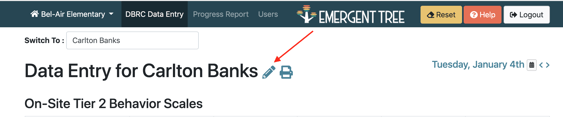
1. Select the DBRC tab. Select the student you wish to edit.
2. Select the pencil icon next to the student's name to begin editing the student's tier status.
3. Scroll down and select the tier for monitoring: Tier 2 (Standardized), Tier 2 (Remote), or Tier 3 (Standardized, but can individualized once you click in each behavior scale's box).
4. Make sure to select the "apply" button after editing and before leaving the page.

Frequently Asked Questions
What if I receive the message of Student ID already exists…but the student is on my current campus?
What if a student is new to my campus (they are transferring from another campus in my district)? View the "transfer a student" section.
My Reporting Periods and the Behavior Support Levels don’t align.