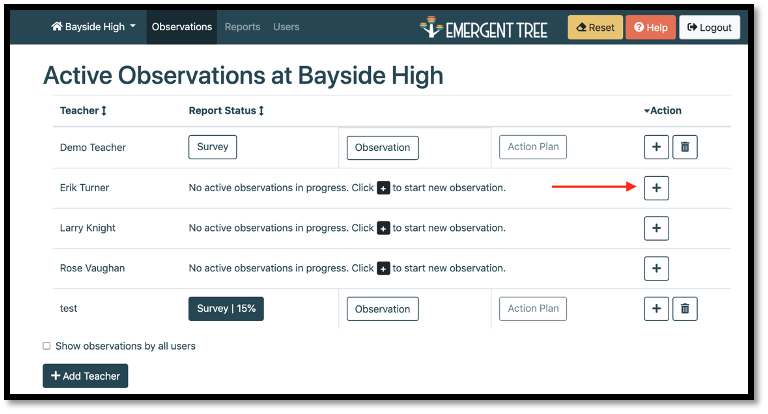
Follow the steps below to begin in observation for a staff member.
- Select the “+” icon to begin an observation.
2. Enter an identifier for the “session” at the top of the page, so you are able to recognize the observation in the future (i.e. date, time, class period…)
- Select the “pencil” icon
 to edit the identifier
 - Select the “lock” icon
 to save the identifier
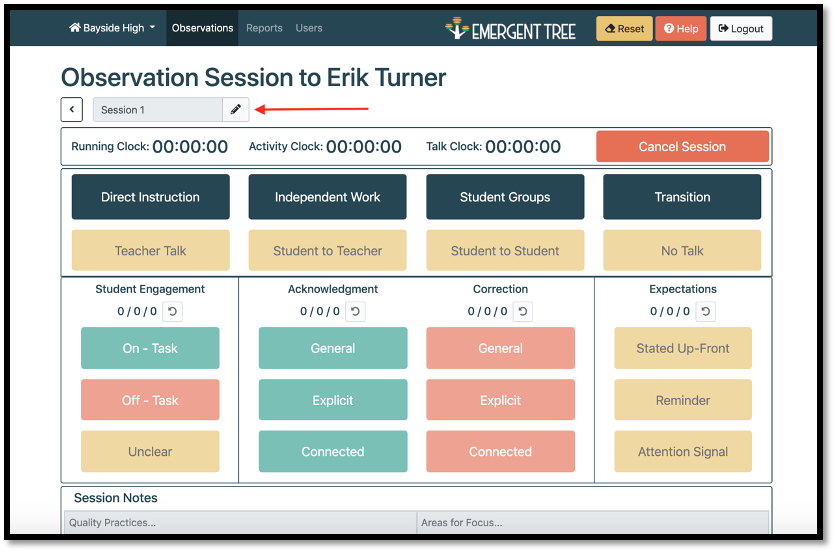
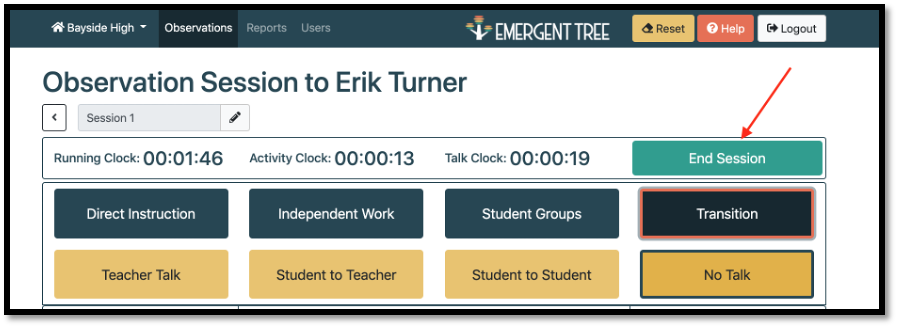
3. To begin the observation, select an “instructional activity” based on what is happening in the classroom. - The “running clock” will then begin.
NOTE: the running clock times the entire observation. The activity clock times each instructional activity. The “talk clock” tracks the amount of time the act of talking is occurring during the observation time.
4. As the activity continues in the classroom, use the “Acknowledgement, Correction, Expectations” buttons and “Student Engagement” buttons to log data for the teacher’s observation.
- Throughout the observation, listen for School Wide Expectations Language, Student-to-Student/Teacher/Student-to-Teacher/no Talk, an Attention Signal, or Activity Expectations and select the button with your mouse each time you hear a prompt
- Any time an acknowledgment or correction is made, indicate this by selecting the correct button with your mouse throughout the observation.
NOTE: keep in mind, acknowledgements and corrections do not always have to be verbal. If you notice non-verbal feedback, you can select the buttons at this time as well.
- Student Engagement: the software takes a momentary time sample in order to take this data. Use this to look at one student in a moment of instruction and decided “are they on task or off task?” as defined by the student’s expectations and the activity. You can then look to another student and indicate “on task” or “off task.”
TIP: we recommend going around the classroom at least one time to collect this data. If you plan to get more student engagement data, go around the room multiple times to collect this data. You can click the current activity again to reset the counter, if you want to do a second measurement of engagement after a significant time has passed.
5. As the teacher moves through the activity, select the type of instruction the teacher transitions to throughout the observation.
- The “running clock” will continue throughout the observation, but the activity clock will restart once a new “instructional activity” is selected. The “talk clock” will restart once a new talking action begins (i.e. “teacher talk,” “no talk,” etc).
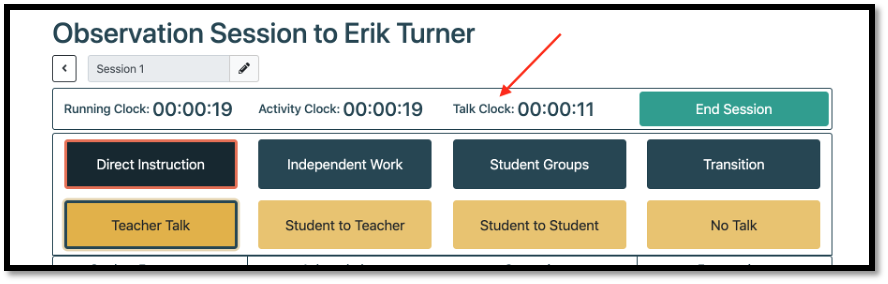
6. Select the “end session” button once you have completed the observation.
7. If you need to observe the same teacher again and keep the data within the same observation session, select the “observations” tab. You can select the blue “plus sign” icon next to the initial observation button.
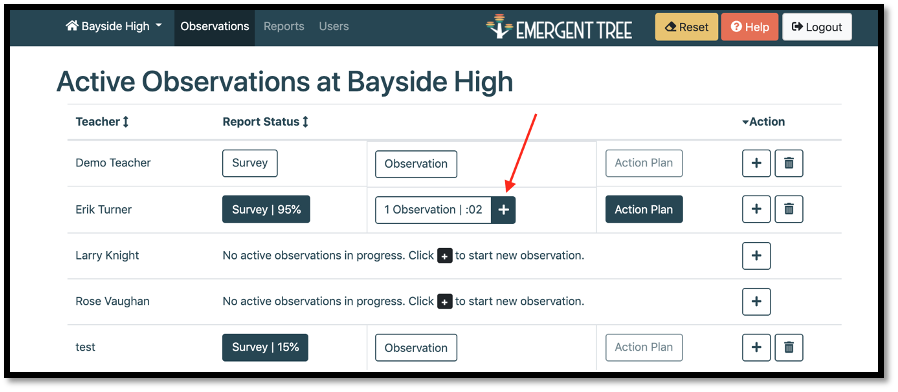
NOTE: add as many observation sessions as needed connected to a single observation record.
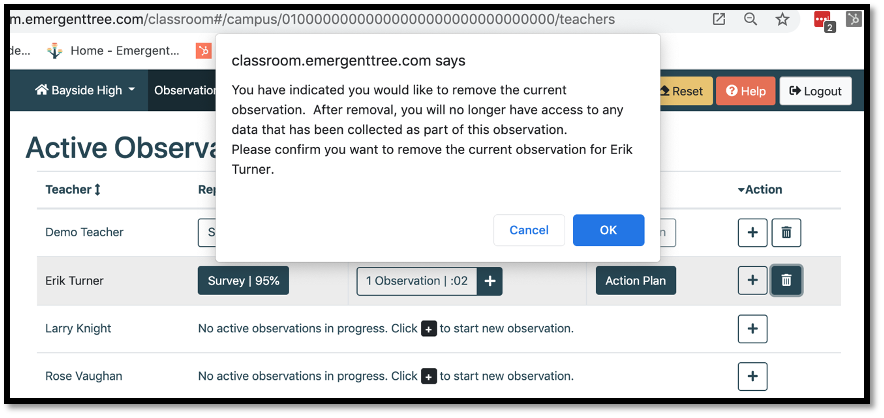
8. If you have started an observation, but wish to delete it from the software, select the “trash can” icon to the right of the teacher’s name.
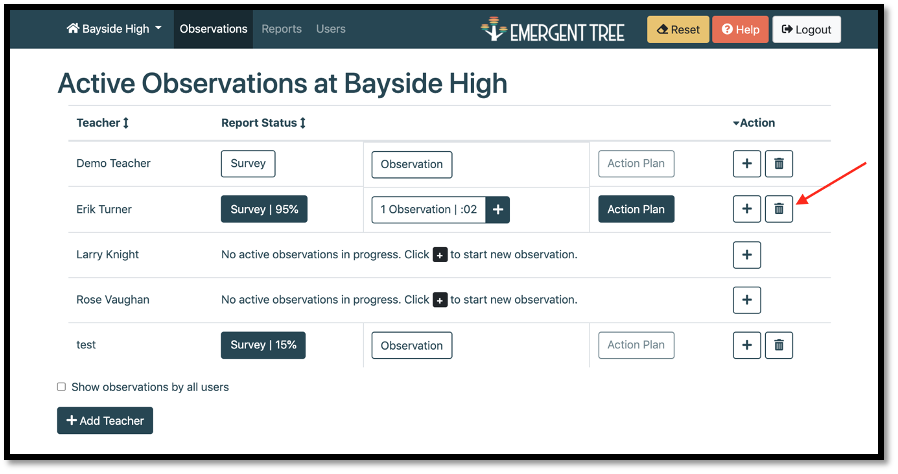
NOTE: if you delete an observation, you will not be able to retrieve it again. A pop-up window will appear to confirm your selection to delete this report.
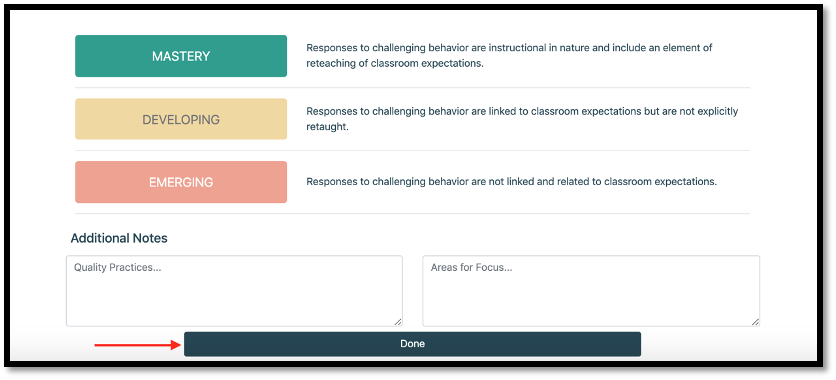
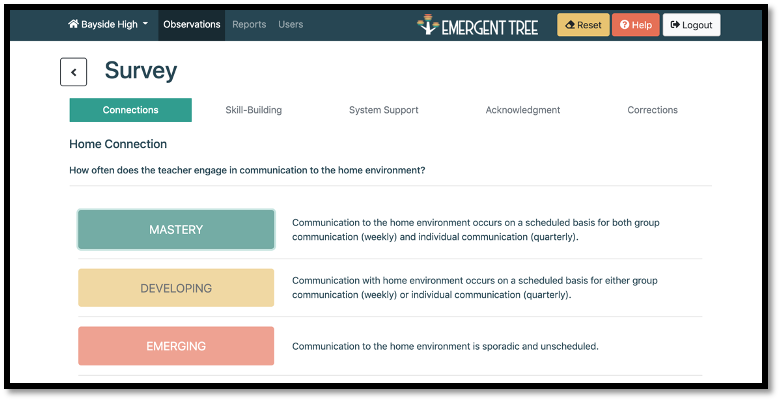
Survey
1. Select the button to complete.
NOTE: You can also complete the “Survey” at any point during the classroom observation (before, during, or after), if needed.
2. Select “Done” at the bottom of the page to continue to the observation.